
Stamped concrete
Stamped Concrete Patterns
Last updated
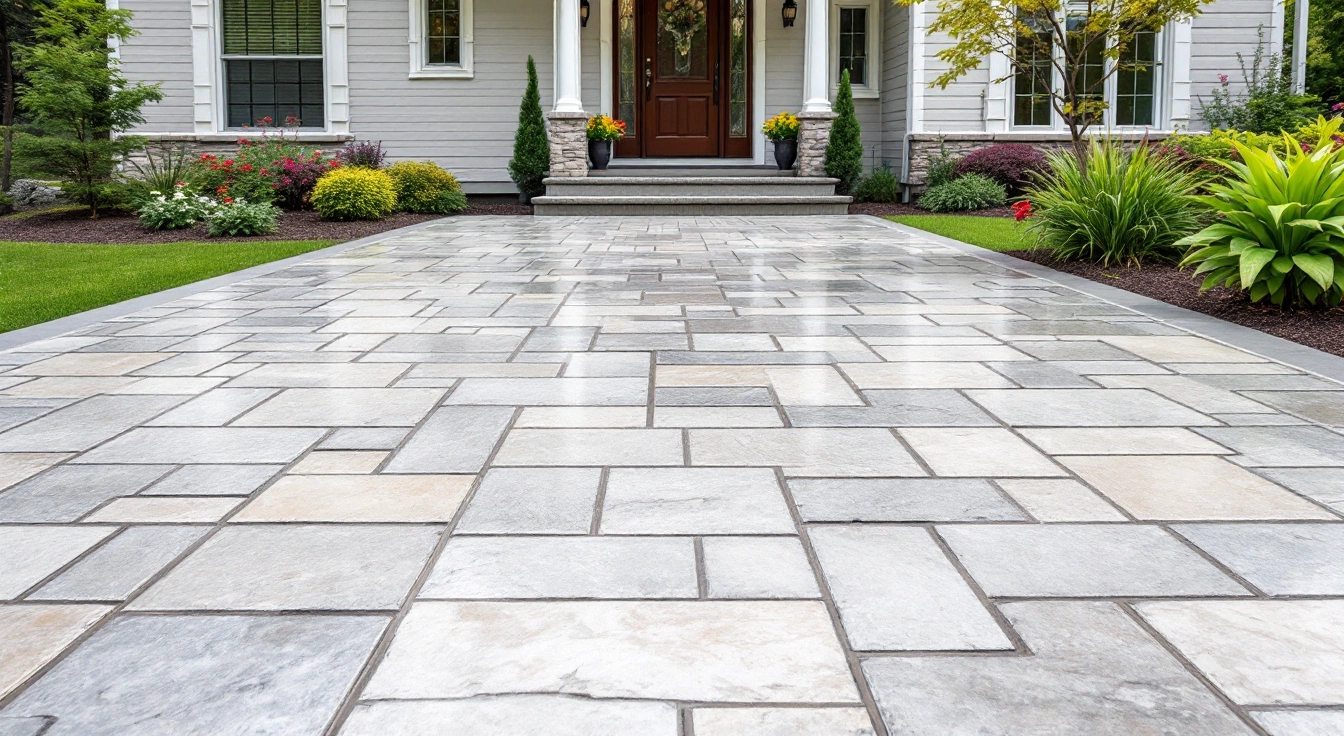
Choose a stamp pattern from a sample of the full proposed finish. Ashlar and brick differ in scale from cobblestone or wood patterns. A texture skin gives texture without a fixed block layout. Keep movement joints in the slab plan, even when the decorative grooves look like joints. Check wet texture before choosing an outdoor finish.
Sections9
Annotated visual records
These schematic drawings explain layout choices. They are not completed jobs, product patterns or construction plans. Diagrams are not to scale; exact stamp dimensions, clearances, joints and water levels need a measured site plan.
Ashlar stone
Large and small rectangles repeat together. Ask for the actual stamp dimensions; a narrow edge can crop the larger blocks.
Random stone
Irregular outlines break up a grid. Draw the real joints over the layout so a joint crossing a stone is visible before work.
Brick
Small rectangles run in offset rows. Label the direction at the doorway, border and any change in path direction.
Cobblestone
Rounded block faces create a close repeat. The drawing cannot show relief depth; test the actual finish with the wheels and shoes that will use it.
Wood plank
Long seams and short end joints suggest boards. These are marks in concrete, not removable timber. Check grain direction and cropped ends.
Texture skin
Surface marks have no fixed stone outlines. Show slab joints and border edges explicitly; a seamless-looking texture still has real joints.
Check the repeat inside the footprint
Lay out the exact stamp dimensions inside the measured space. A border reduces the patterned field; narrow paths crop more blocks. Show real joints across the decorative layout instead of treating the stamp grooves as a joint plan.
Suggested sketch palette: Stone base / dark accent. Approximate screen colours only; cured colour varies. Approve the actual base, accent and coating on a physical sample.
Record the exact stamp set, base and accent methods, border area, true joint layout, coating and sample date with the chosen option. Surface drawings cannot establish wet grip, slab strength or local approval.
Stamped concrete patterns set the look of the surface, but they don't set the joint plan. Pick a pattern that fits the space. Check its grooves and borders against the planned cuts.
A picture of a stone pattern can't tell you how it will feel under chairs or shoes.
Stamped concrete patterns at a glance
Pattern names describe a family, not one fixed stamp size. An ashlar set from one maker may have different block sizes from another. Ask for the exact layout dimensions instead of choosing from a small photo.
Compare texture families such as stone and brick in Brickform's stamp catalog, then view a sample of the proposed pattern and finish together.
| Pattern family | Visual effect | Check before choosing |
|---|---|---|
| Ashlar stone | Rectangular stone blocks in a repeating set | Block scale and repeating marks |
| Random stone | Irregular outlines | How cuts pass through the outlines |
| Brick | Small units in ordered rows | Direction at steps and edges |
| Cobblestone | Rounded or worn-looking block faces | Relief under small wheels |
| Wood plank | Long grain and board lines | Direction, seams and outside traction |
| Texture skin | Surface texture without fixed units | Planned joints and perimeter detail |
Scroll for more →
This table is a selection aid. It doesn't rank materials by strength or certify wet grip. All these finishes still need a slab suited to its use.
Match pattern scale to the space
A wide driveway can show the full repeat of a large stone pattern. A narrow path may show only fragments. Sketch the exact stamp repeat inside the measured area.
Check the first row near the house and the last row by the street. Cropped blocks are normal, but you can choose where the cuts will sit.
Use the furniture layout on a patio as well as its empty footprint. Chair legs may land in recessed lines. A heavily textured face can make a table rock.
That is a sample check, not a reason to reject every stone pattern. Put the proposed chair on the sample and move it through the likely seating positions.
For a path, look at the texture along the walking line. A pattern that looks good from a balcony may feel uneven at ground level. Include the place where a wheel, cane tip or small caster crosses a groove.
The stamp's name alone won't answer that question.
Direction and repeated marks
Brick rows and wood grain lead the eye in one direction. You can align them with the house, the long side of a patio or the path of travel. Those choices can conflict on an irregular site.
Make the intended direction clear on the plan before pricing.
A stamp set has a repeat. Ask to see a larger example so you can spot the same knot, crack or stone face appearing again. Rotation may reduce the obvious repeat, but the layout still has to fit the selected set.
Don't use a close-up as proof that a large slab will look random.
There is no need to match every nearby material. A stone-like field beside real brick can work through a shared color range. An exact imitation is harder to judge and may look less convincing beside the real surface.
Compare both from the distance at which you will usually see them.
Decorative grooves and slab joints
Stamp grooves describe the surface pattern. Contraction joints give shrinkage cracks a planned place to form. These are different jobs.
NRMCA CIP 6 explains the functions of slab joints. Its guidance is general concrete practice, not your town's adopted requirement.
Show the joint layout on the same sketch as the pattern. A cut may cross several apparent stones. That can be less distracting than a slab crack crossing them later, but joints don't promise a crack-free surface.
Ask how the cutter will treat corners and borders. Check places where slab width varies.
The installer should explain contacts with the house. Check the details at an existing walk or another pour too. A decorative line is not proof that these contacts allow the required movement.
Record the joint detail. You don't need to choose an engineering detail from a photograph.
Borders and transitions
A border can frame a large area and let the field pattern end at a clear edge. It also adds another layout, and sometimes another color or placing stage. Price the border as a defined part of the work.
State its width, length and finish rather than just asking for a border.
A plain textured walking strip beside a patterned field is another option. Compare the single textures, multiple textures and stamped borders described in Solomon Colors' finish overview before choosing the transition between surfaces.
The example choices here are planning suggestions, not evidence of a completed job.
At a step, check where the tread face meets the stamped surface. At a garage, check the finish beside the threshold. Small transitions can matter more in daily use than the middle of the pattern.
Include them in the sample and scope so they don't become an unpriced assumption.
Wet texture and surface care
Raised texture doesn't prove a surface is slip resistant in every condition. Water and dirt matter. So do the slope and selected sealer.
Ask for the proposed finished sample, including any traction treatment. Look at it wet and dry. A glossy sample shown indoors may give little guidance for a shaded outdoor path.
Keep cleaning methods tied to the installed surface system. Aggressive cleaning can affect color or sealer. A maker's care sheet is more useful than an unsourced instruction to pressure wash every stamped slab.
Retain the product details even though there is no product purchase recommendation on this page.
For repairs, remember that the pattern is only part of the match. Base color and accent affect appearance. The sealer and age of the surrounding slab also matter.
Keep a record of the stamp name and the batch information. A later patch may still show, so don't treat a patterned finish as an invisible-repair system.
A pattern selection worksheet
For a rectangular patio, mark the door and seating. Add the travel route. Place the stamp repeat in that outline.
Add joints and the intended border. Then inspect where those lines cross the table zone and threshold. You can reject a poor layout before it becomes a large wet slab.
For a driveway, use the same approach with wheel paths and street access. A narrow border may frame the entrance without covering the full driveway in a costly pattern. This is a design option, not a promised saving.
Compare the plain and stamped scopes using the same area and base requirements.
Record these decisions on your worksheet:
- Exact pattern family and stamp set.
- Measured repeat and chosen direction.
- Color and accent method.
- Joint plan and edge treatments.
- Finished sample, including sealer.
- Cleaning and later repair expectations.
For background, read what stamped concrete is. The color guide explains how the same pattern can look different after coloring. These routes should help you choose one defined finish before comparing prices.
FAQ: stamped patterns
Is a wood pattern made of wood?
No. It is concrete with a wood-like texture pressed into the fresh surface. The board lines and grain create the visual effect.
It still needs concrete joints, curing and a suitable slab plan. Judge its outdoor texture from the finished sample rather than assuming it behaves like a timber deck.
Can the pattern replace control joints?
No. Decorative grooves and contraction joints serve different purposes. A groove can look like a masonry joint without having the required position or cut detail for the concrete slab.
Show both layouts on the plan. The NRMCA joint guide explains why shrinkage and movement still need attention on decorative work.
Which pattern fits a small patio?
There isn't one pattern that fits every small patio. Compare the full stamp repeat with the measured footprint. Check how much of each apparent stone or plank remains at the edge.
Chair stability and the route from the door matter too. A sample and layout are more useful than a popularity ranking.
Can two patterns share one slab?
They can be part of one project, but the installer must plan the placing sequence and boundaries. Different colors or textures can require extra stages. Put the division on the sketch and request a separate cost for that detail.
A decorative boundary must also agree with the concrete joint plan.
Verdict on stamped concrete patterns
Choose stamped concrete patterns to fit the scale and daily use. Check the finished texture. Set the joints and transitions before you accept the layout. Keep the sample and exact pattern record. A well-defined finish gives you a useful basis for the stamped concrete cost guide and a project estimate.